
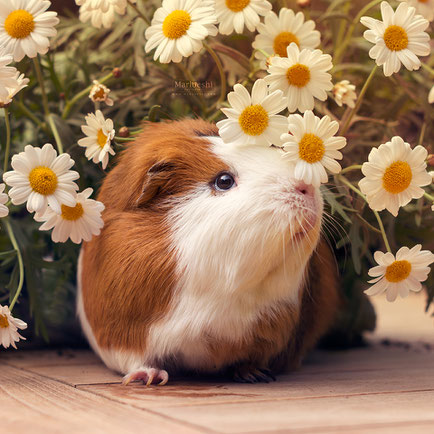
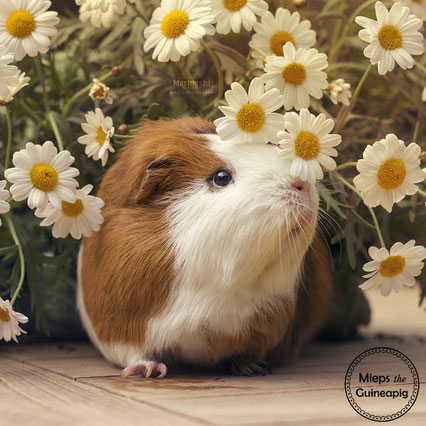
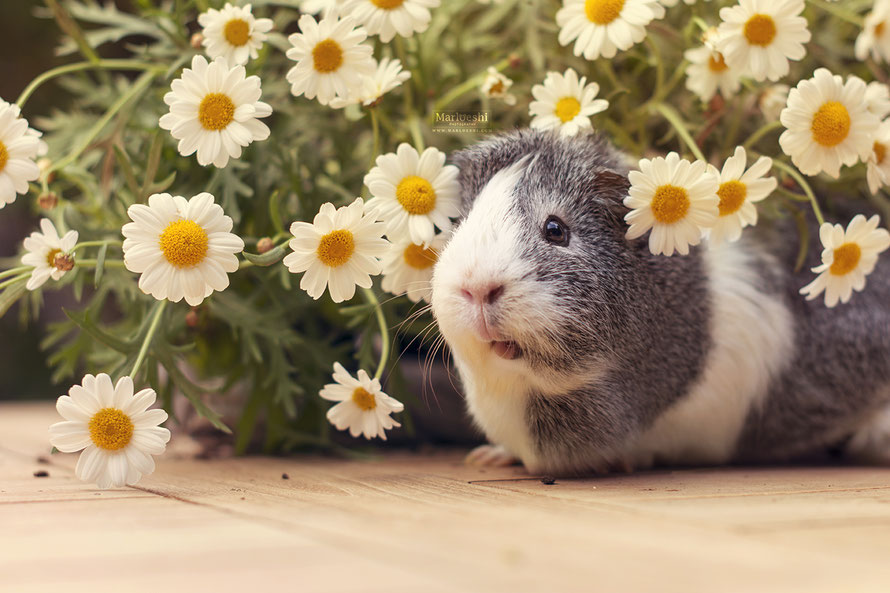
Behind the scene: Daisy photoshoot
I take you behind the scene of the photoshoot with daisies. This photoshoot was really easy and you can do this yourself too! All you need are flowers and a pretty model.
Introduction
In this blog I will explain which items I have used for the daisies photoshoot. It's very easy and doesn't cost a lot of time or money. All you need are flowers and a model that will not eat the flowers!
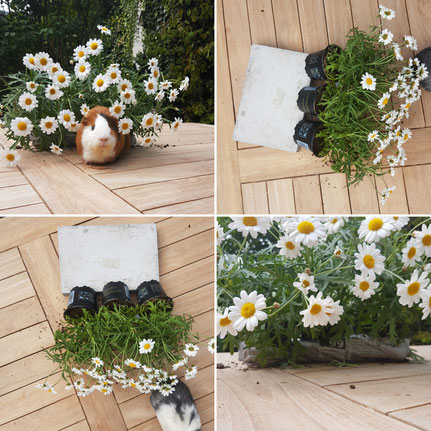
How I made the setup:
The set up was very easy to create. All you have to do is fold a newspaper into a roll, so you can put the bottom of the flowers on there. This way you get the flowers to stand up a little.
I have used:
- Daisies I bought at the local florist (€ 1,50 each)
- Wooden table
- Newspaper
Post processing
I used the program Photoshop to edit the photos from this photoshoot.
I started with selecting the images I liked the best, I prefer doing this with Adobe Bridge. You can easily give stars to photos you like, so you can find them back later.
When I start editing I begin with adjusting the RAW file in the RAW converter. With the photos from this photoshoot I adjusted brightness, white balance, shadows and I added some brightness to
Mieps and Archie's eyes.
When I finish with the RAW converter I open the photos in Photoshop to start editing.
Step 1: At first I cloned away distracting pieces of dirt that were on the table. After that I made the newspaper in the right corner a bit greener, so it wouldn't be so visible.
Step 2: When I was happy with the corrections I added various adjustment layers like 'curves', 'gradients' and 'levels' to make the photo more moody and
warmer.
Step 3: Almost done! I added some more brightness and final colour corrections to get the result I wanted.
Step 4: The final step is adding my watermark and save it to a jpeg file so I can share it on Instagram.

1. The original photo

2. After cloning some dirt away and colouring the newspaper in the right corner green
3. I made the photo more moody with various adjustment layers like gradienst and curves
4. Finally I adjusted the brightness and contrast and applied colour correction
Settings: ISO 100 - F2,5 - 1/800 sec. Camera: Nikon D7200 Lens: Nikkor 50mm f1.4
Editing software: Photoshop
Check out previous blogposts

Shirley (Wednesday, 12 April 2017 10:40)
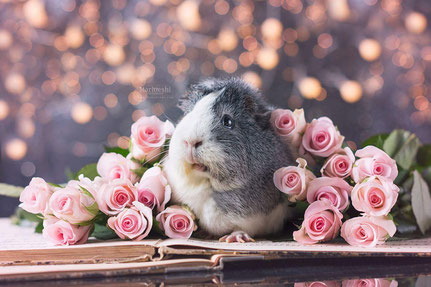
Your photoshoots are awesome!! The photos turn out SO nice and professional-looking! It also helps that your models are adorable piggies :) I love how you experimented with daisies this time. The rose photoshoot was my absolute fav!
Linde (Friday, 14 April 2017 23:49)
Super leuk idee!