
CHEAP AND EASY PHOTOSTUDIO
Would you like to take photos of your pets, but you don't have a fancy photostudio or a beautiful garden? With this easy step to step guide you can take beautiful photos of your pets in the comfort of your home. Keep on reading to find out how. And yes - even with your phone you can take adorable photos this way!
WHAT DO YOU NEED
What do you need?
1) Backdrop: roll curtain from IKEA, wall paper, wrapping paper or a blanket. Be creative! It does not have to be expensive;
2) Clothing rack, footstool or a chair to put your backdrop on. Again, be creative! Even a cardboard box might be perfect to hold your backdrop;
3) Daylight.
What is optional:
1) Reflective screen. You can also use aluminum foil wrapped around some cardboard, a white sheet or something else that will reflect the light;
2) Accessories for the photoshoot.
''Easily create your own home studio for photographing
small pets like guinea pigs.''


TAKING PHOTOS STEP BY STEP
1) Find the light
Photography is working with light. And if your light is nice your photos will very likely be nice too. You don't need fancy studio equipment to get nice light. I think the prettiest light is
free: daylight! The trick is to find a good spot to take photos. You will need plenty of light to work with and some space to take photos. I like to work right next to a window. Remember: the
further away from the window the less light you'll have. I prefer to take photos when the light isn't very harsh. The light is usually softer in the early morning and the late afternoon. Of
course the exact time depends on which season you're in and if it is sunny or cloudy. You should try a few different times at your photo spot to see which time you would get the results most to
your liking.
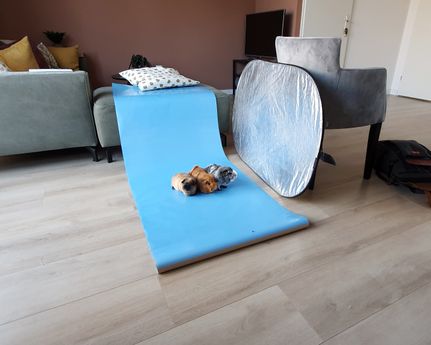
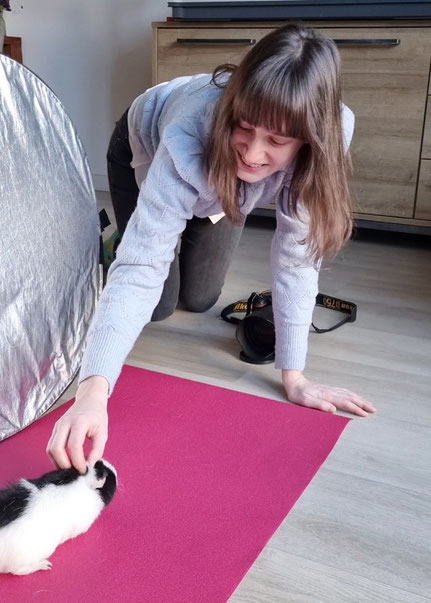
2) Set up your studio
I like to throw a roll of wallpaper over a little footstool. I put my reflective screen against a chair on the oposite side of where my light source is. This way you can light up the
shadow side of your subject. I used to work on a self made setup similar to a table. I would not do this anymore because I prefer to work on the ground.

''Remember: photography is working with light.
Nice light = nice photo''
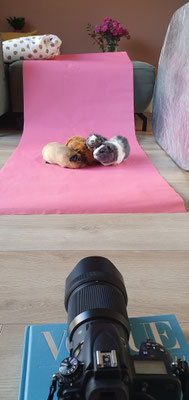
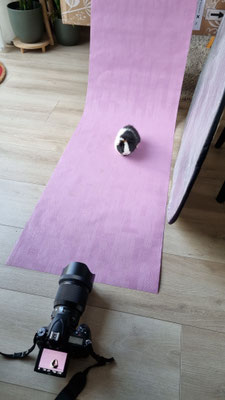
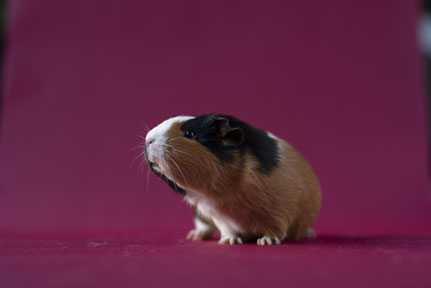
3) Test shots
Take a few test shots to finetune your camera settings and to make sure your setup is to your liking before you grab your guinea pigs. Maybe you need to move closer to your light source or
you might want to get a little closer with your camera. You can also work with a 'dummy'. Grab an item that is similar to the size of your guinea pig and test your settings and setup. Guinea pigs
can be very impatient and will likely run off during the shoot. This is why I prefer to work on the floor - they can't fall off your setup if you're already on the floor.
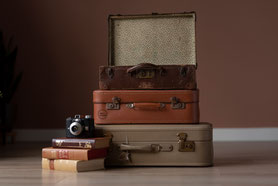
Here is an example of a test shot. At first I thought the setting was too empty. Then I didn't like the pile of books after all.
I thought the image would be too crowded when I would add the piggies into the scene.
4) Camera settings
If you work with a camera you can install manually I like to work with a shutter speed of 1/400 or higher. I like to set my aperture on something between f1,8 and f2,8 depending on how many piggies I want to photograph and my setup. Try to keep your ISO as low as possible. Of course your settings depend on the setup and the light you have available.
If you're not comfortable working in the manual mode an option is to use the aperture preference mode. This way you set the aperture and your camera will pick the shutterspeed and ISO. If you have piggies that move around a lot, which are most piggies, I would recommend using the shutterspeed preference mode. Check your camera manual how these settings are called for your brand camera.
If you work with a mobile phone test a few different options like potrait mode or the pro mode. Try flipping your phone up side down. Move closer and move further away. See what works with your phone.
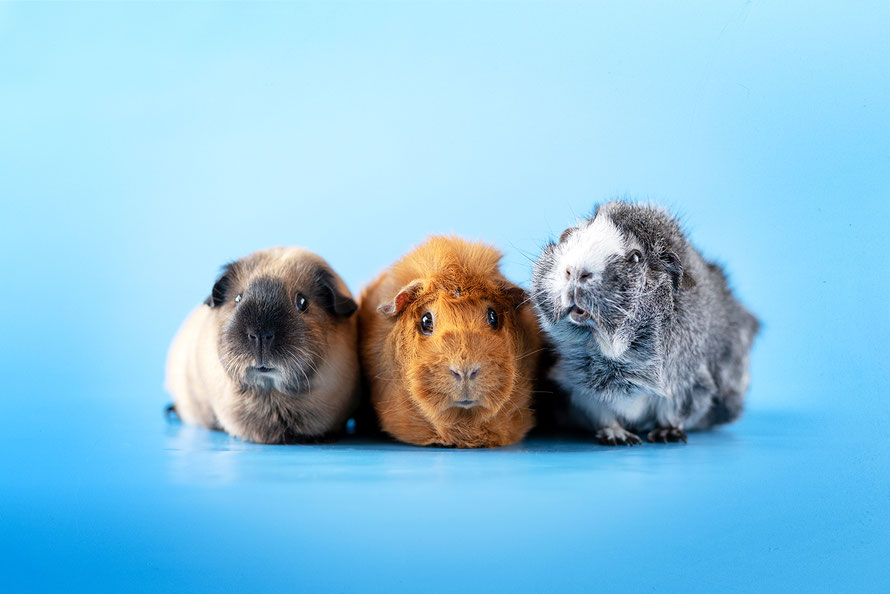
5) Time to take pigtures!
When you're happy with your settings and setup you can grab your models! And snap snap snap away. I like to work at eye level to really get into the world of my subject. You can change things up and take a creative photo from above or from below.
Please remember to be patient with your pets and to stop taking photos in time. Your pets don't know what's going on or what you expect from them. Make sure they get frequent breaks and keep an eye on their behaviour and stop taking photos if neccessary.
I like to make sounds to get my models to look at me. You can also bribe them with food. Food is also a nice prop to use.
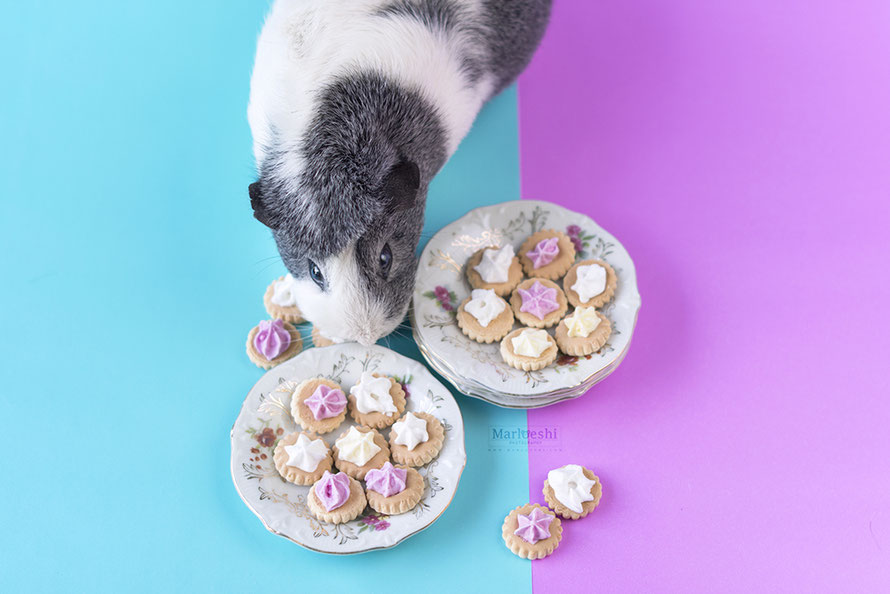
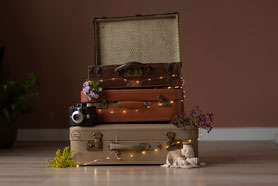
Here is an example of a photo taken from above.
6) Edit your photos
Give your photos that little extra pop in an editing program like Photoshop. You can also use an app like Pixlr or Picsart. I like to adjust the brightness, levels, contrast and colours a bit. Editing your photos makes a huge difference and the edit does not have to be very complicated. Find a program or an app that you like and start working with it. The more you practise the easier editing will get!

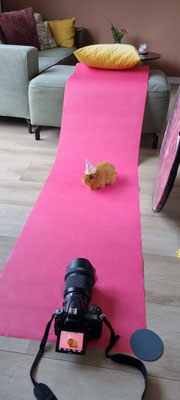
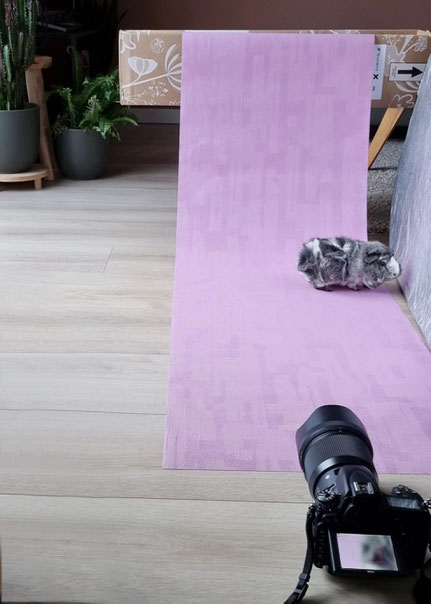
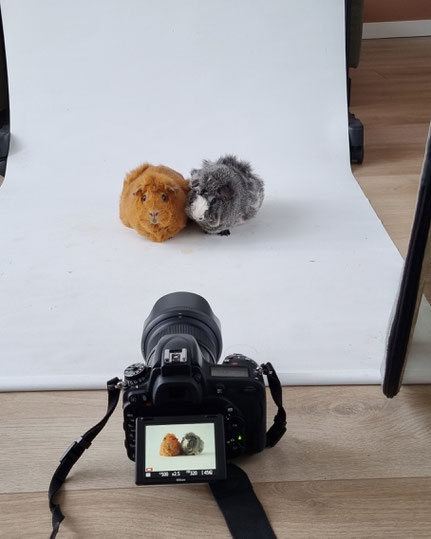
You can find the behind the scene image from this photoshoot below. As you can see: very simple setup.
I use the cardboard box on top of a footstool to have more height in my photos, but this is not absolutely neccessary.
BEFORE AND AFTER EDITING
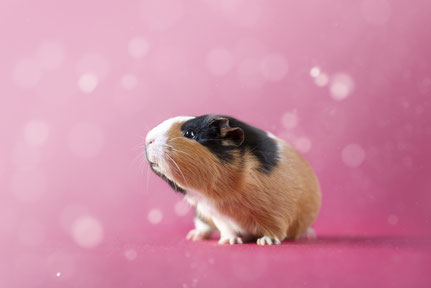
I used photoshop to edit this image. I used the curves to make a vignette, adjusted the levels and brightened the image overall and made the colours more vivid. I like to use an overlay with some dust like shapes to add a playfull effect to the photo and to create some depth. You can find overlays all over the internet. I bought these dusty overlays from RAWexchange.
PHONE PHOTO EXAMPLE
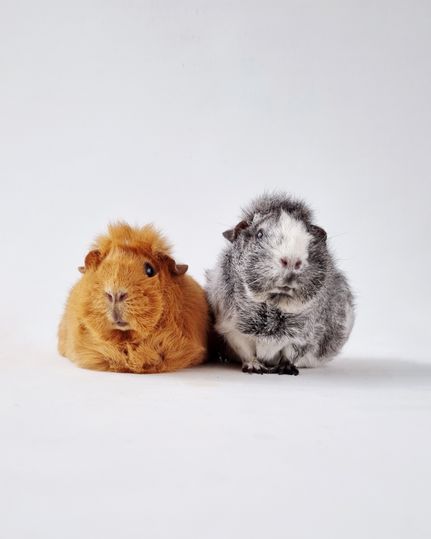
I took this photo with my phone. Yes, both of them! As you can see you can get very nice results with your phone too.
Take your time to find nice light - remember: nice light = nice photo - and to get your settings right.
Experiment with some editing and you'll get very cute images!
Hey! You might like this:
Thanks for reading my blog! If you'd like to support my work you can buy the "Guinea Pig Photography Guide'' as a digital download. It's full of photography tips, photo inspiration and a step by step editing of a photo. A (dslr) camera is preferred to take pictures with, but you will get plenty of tips and inspiration if you're a smartphone photographer.


Guinea Pig Photography Guide - Digital Download
The Guinea Pig Photography Guide will help you take cute photos of your guinea pigs or other pets. Get inspired to take your own adorable photos of your pets. This is a digital download and contains 48 pages of inspiration.
You will receive this digital download as a .pdf file via email. When you receive the notification 'your order has been shipped' I have send you the .pdf via email.
€ 4,99
including tax
- Available