
Behind the scene: flying candles
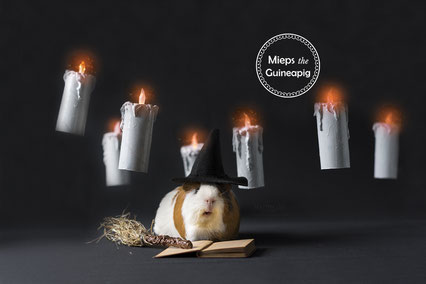
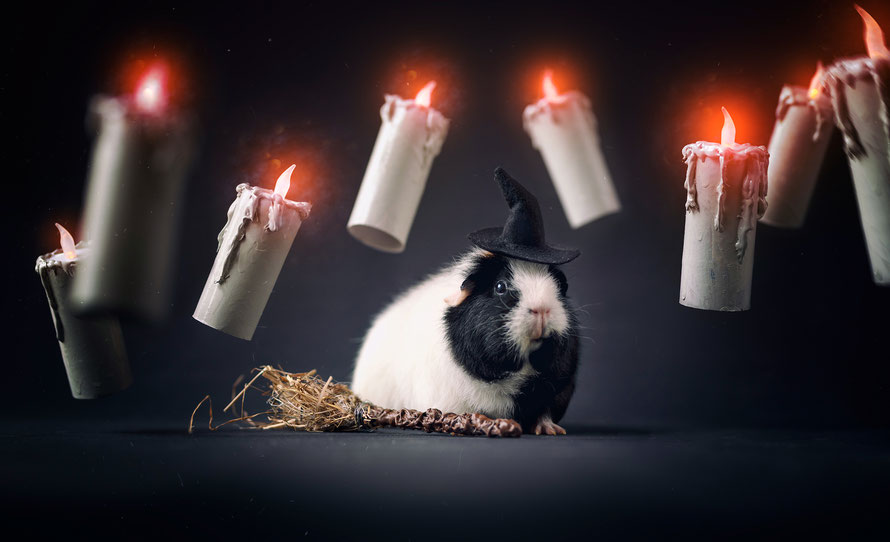
Today I did a photoshoot with Mieps, Archie and flying candles. Yes, you read that right FLYING candles! The candles are actually very easy to make, there is a downloadable .pdf file on how to make them yourself at the end of this blogpost. Continue to read more about this magical photoshoot!

In this blogpost I will talk you through this image. I will explain which items I have used, the postprocessing and how I created the flying candles.
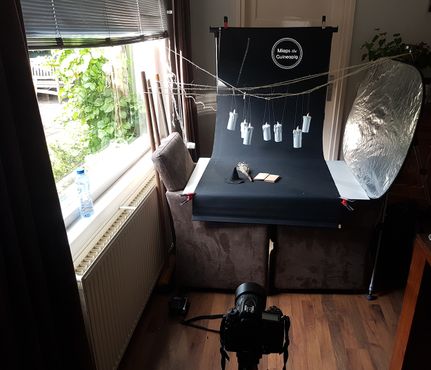
How I made the setup:
The set up cost me about one hour to complete. I started with attaching the rope to the brooms and a tripod, so I would get lines where I could attach the candles to.
When I was happy with the setup I put my camera on a tripod and I made my composition.
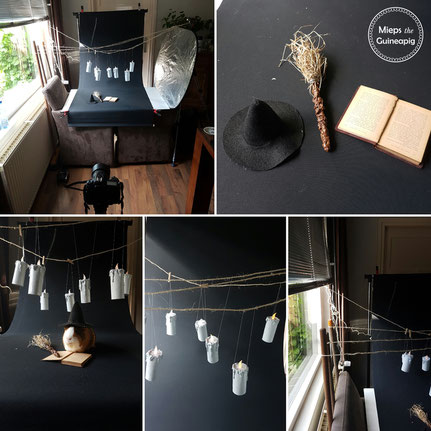
I have used:
- Tiny books I bought at a secondhand store
- A felt hat (made it myself, you can order one here)
- Candles (made them myself)
- Piggy sized broom (homemade from a pencil and some hay)
- Black roll curtain from IKEA
- Reflective screen
- Rope
- A bunch of human brooms to attach the rope to
Post processing
I used the program Photoshop to edit the photos from this photoshoot.
I started by selecting the images I liked the best, I prefer doing this with Adobe Bridge. You can easily give stars to photos you like, so you can find them back later.
When I start editing I begin with adjusting the RAW file in the RAW converter. With the photos from this photoshoot I adjusted brightness, highlights, shadows and I added some brightness to
Archie's eyes.
When I finish with the RAW converter I open the photos in Photoshop to start editing.
Step 1: I started cloning away all the wires and other distracting objects.
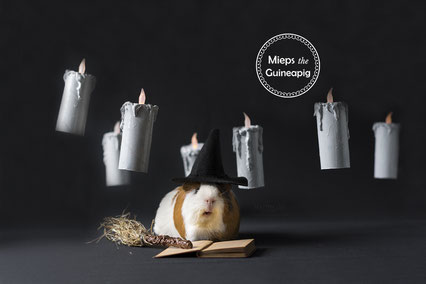
Step 2: After that I gave the candles an orange glow and I put a golden bokeh stockphoto in the lights, to give it that little extra magical feeling.
Step 3: When I was happy with the candles and background, I adjusted the colours with Nik Analog Efex pro to make the image more moody. You can download this plugin for Photoshop for free. (update 2023: the NIK collection is not free
anymore)
Step 4: Finally I adjusted the brightness/contrast, applied colour correction and changed the colours with 'curves'. Last step is to add my watermark and resize the photo
for Instagram.
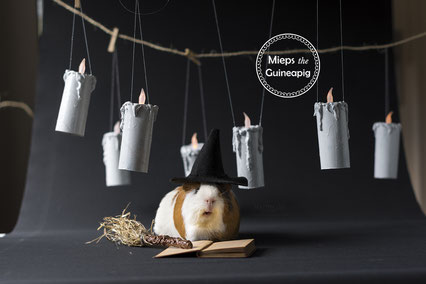
The original photo
After cloning the wires away
Gave the candles a little extra light

The Nik Analog Efex adjustments
The final adjustments

Settings: ISO 100 - F2,2 - 1/160 sec. Camera: Nikon D7200 Lens: Nikkor 50mm f1.4
Editing software: Photoshop and the NIK collection
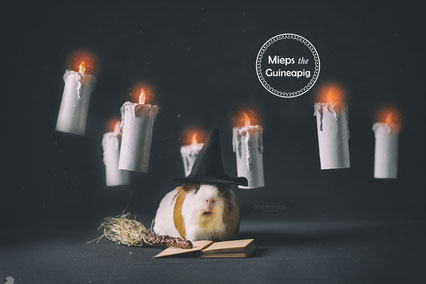
I retook this photo over 6 years after the original photoshoot. Below you can see Lies rocking the witchy vibes!
Settings: ISO 200 - F2 - 1/400 sec. Camera: Nikon D750 Lens: SIGMA 85mm f1.4
Editing software: Photoshop and the NIK collection
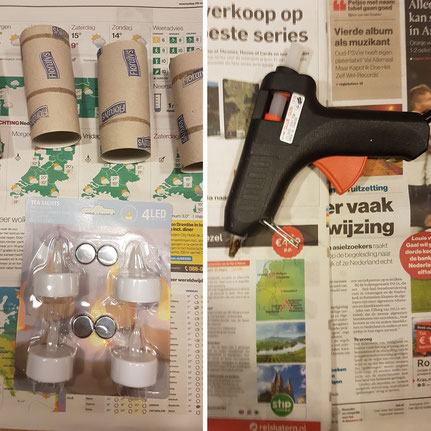
How To Make Floating Candles
You will need:
- Toilet rolls
- Glue gun
- Battery powered tea lights
- Needle & thread
- Paint
Feel free to share this blogpost with your friends!
You might like...


Pien Bow Tie Enamel Pin
The pin has glitter on the bow and the pin can be safely secured with a metal clutch, yay!
Perfect for on a denim jacket, your backpack or other clothing.
Some details:
❤️ Super cute guinea pig pin
❤️ With glitter on the bow
❤️ Approximately 25mm (1 inch)
❤️ Hard enamel pin is made from metal
❤️ High polish copper finish
Free shipping • ships worldwide • ships in 1 - 3 business days
€ 10,95
including tax
- Limited Availability