
The secred behind: ''Oh no!''
In this new blogpost series ''The Secret Behind'' I am going to explain the secret behind photos I took in the past. Mostly the special piggy edits like the ''Oh No!'', ''Mieps In The Clouds'', ''Piggy Potter'' and ''Let Lights Guide You'' photos. The first one in the series is the ''Oh No!'' photo, one of my personal favourites. Keep reading to see which items I have used and how I've achieved the end result in Photoshop with layer masks.

Introduction
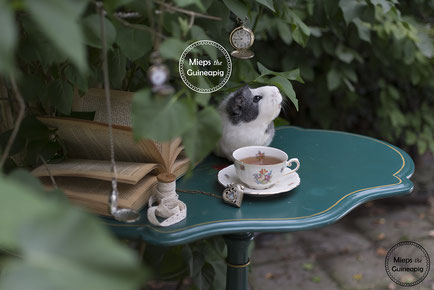
In this first blogpost about '' The Secret Behind'' I will explain how I've made the ''Oh No!'' photo. It's one of my personal favourites. I am just in love with the mood, how Mieps poses and the smoke coming in the frame. Please let me know what you think at the bottom of this blogpost.
How I made the setup:
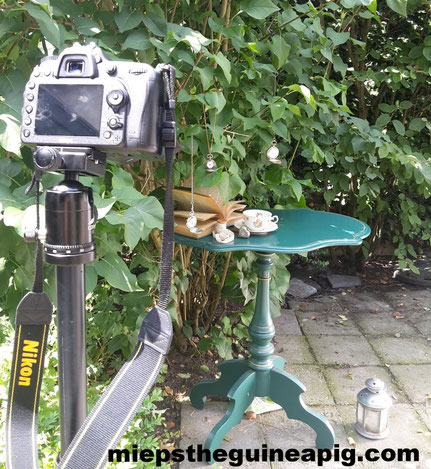
The set up cost me about 2 hours to complete. The most work was getting the perspective right.
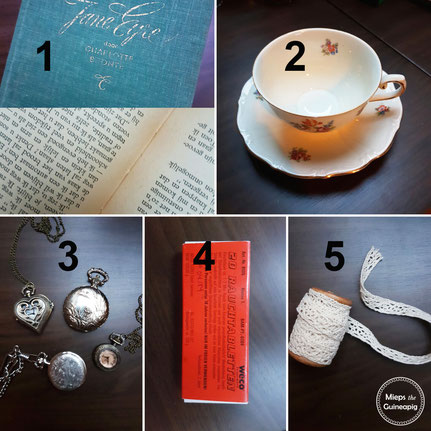
First of all I collected all the props I wanted to use: teacups, lace, books, pocketwatches and so on.
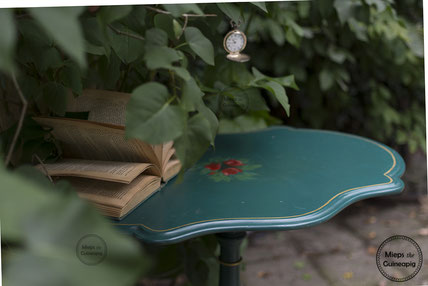
Step 1: Put the table in the right position. I wanted the leaves to be a frame to create more depth in the photo. It was a challenge to make everything perfect. In this step I
setup my camera as well to get the right composition.
Step 2: When I was happy with how the table was positioned and the perspective from my camera, I started to put the props on the table. You can see my finals set-up in the
photo below.
Step 3: Everything is in place, so time to shoot! When I am working with smoke I make sure to take photos of Mieps first and photos of the smoke afterward. As I don't want
Mieps to inhale any of the smoke as it is not healthy for humans or animals. The reason why I take photos of Mieps first and the smoke after is that when Mieps moves props a bit it isn't a
problem with the postprocessing. If I photograph the smoke first and Mieps moves props, it's harder to align the different layers. It will be more clear in the editing story with visuals, I
promise!
Step 4: Take photos of the smoke. The fun part, I use smoke tablets to do this.
I have used:
- Table from my grandfather
- Book bought from a fleamarket (1)
- Teacups bought at fleamarkets (2)
- Pocketwatches
from Aliexpress (3)
- Smoke tablets from a party store or you can get them online (4)
- Lace from the Xenos (5)
Post processing
I have used the program Photoshop to edit this photo.
I started with selecting the images I liked the best, I prefer doing this with Adobe Bridge. You can easily give stars to photos you like, so you can find them back later.
When I start editing I begin with adjusting the RAW file in the RAW converter. Here I adjust, for example, brightness, contrast and the white balance.
When I finish the first step I open the photos in Photoshop to start editing.
Step 1: Add the photos I want to work with into one file, five photos in total. Make sure you adjusted all of them the same so you do not see differences in light or contrasts.
You don't want the photos to be too different, as that makes it very hard to align the photographs in one layer. You can see the photo I have used as my ''base'' image, so where I put the layers
on top of, below. It's the original file with Mieps her best pose for this photo!
Step 2: After that I start working with layer masks to remove parts of the other photos that I do not want to use.
Step 3: When I am satisfied with the result I make the photo moodier. I chose for a blueish and greenish toning here, because I thought it made the photograph more
mysterious and it would compliment the leaves and the table.
I adjusted the mood with the NIK collection ''color effex pro 4'' set. You
can download it for free for Photoshop!
Step 4: Adding adjustment layers: brightness/contrast, colour balance, hue/ saturation, lighting and viberance.
Step 5: The final step is adding my watermark and save it to a jpeg file so I can share it on Instagram.

Smoke tablet in action!

One of the smoke photos I have used.
When I was editing I noticed the pocketwatch in the front of the photo was a bit distracting. So I went back to take this photo from about the same perspective as the photos I've already used. As you can see I had to turn the photo a bit to make it match to the perspective of the other photos I have worked with.
Working with layer masks

Settings: ISO 100 - F2 - 1/1000 sec. Camera: Nikon D7200 Lens: Nikkor 35mm f1.8
Editing software: Photoshop and the NIK collection
There are no comments yet.