
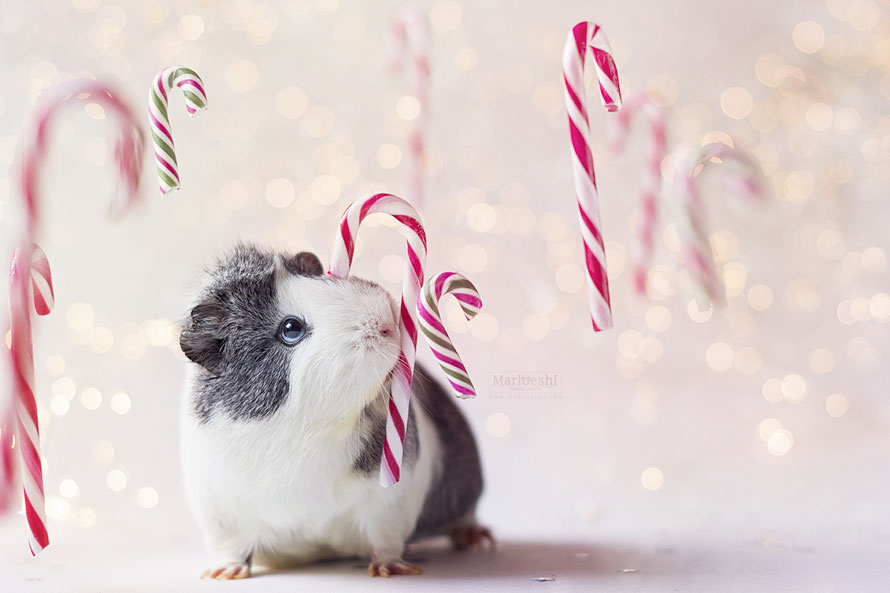
Behind the scene: flying candy canes
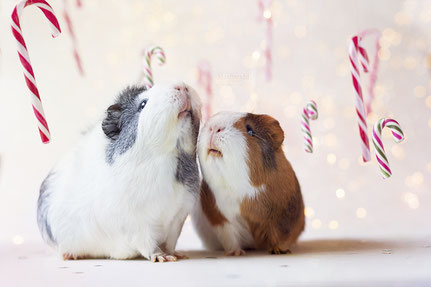
Today I did a Christmas themed photoshoot with Mieps and Archie. Unfortunately they weren't in the mood to be piggy models, but I managed to get some cute shots after all. Hope you enjoy this blog post!
How I made the setup:
The set up cost me about 2,5 hour to complete.
First of all I set up my general setup with my clothing rack and a white roll curtain as a background.
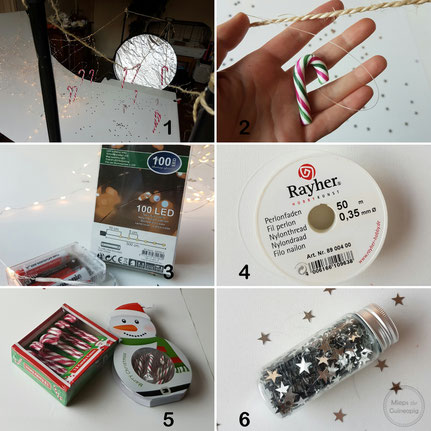
Step 1: Set up the lines to hang the Candy Canes to with nylonthread. I used a broom and tripods to attach the lines to.
Step 2: When I was sure the lines were secure I started unwrapping the candy canes from the plastic seal and I attached about 15 candy canes with nylonthread to my line.
Step 3: After that I put the LED lights in the back of the photo set up, so they would become circles in the background when you use a low aperture (for example: f1,8).

I have used:
- Battery powered LED lights from the Action (3)
- Star shape glitter from the Action (6)
- Candy canes from the Action (5)
- Reflective screen from Aliexpress (1)
- White roll curtain from IKEA
- Clothing rack from Blokker
- Nylonthread (stolen from my mum's stuff) (4)
Post processing
I have used the program Photoshop to edit the photos.
I started with selecting the images I liked the best, I prefer doing this with Adobe Bridge. You can easily give stars to photos you like, so you can find them back later.
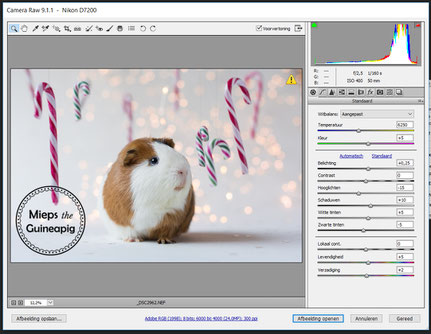
When I start editing I begin with adjusting the RAW file in the RAW converter (see photo below). Here I adjust, for example, brightness, contrast and the white balance.
When I finished with the first step I opened the photo in Photoshop to start editing.
The first thing I did was remove the nylonthreads that were very visible with the clone stamp.
After that I adjusted the colours with the NIK collection ''color effex pro 4''
set.
Lastly I have added colours to make the photo warmer and more moody. I've used the 'gradient tool' for this and some of my own stock images (see right).
The final step is adding my watermark and save it to a jpeg file so I can share it on Instagram.

The gradient, it's a standard option in Photoshop
My own stock photo, it's a photo of rain on the window.
Another stock photo I shot. It's a photo of pink blossoms on a sunny day completely out of focus.
Settings: ISO 250 - F2 - 1/250 sec. Camera: Nikon D7200 Lens: Nikkor 50mm f1.4

Kelsie Hermanson (Tuesday, 07 February 2017 02:28)
My spouse and I absolutely love your blog and find a lot of your post's to be what precisely I'm looking for. can you offer guest writers to write content to suit your needs? I wouldn't mind producing a post or elaborating on a number of the subjects you write regarding here. Again, awesome web site!
Yuki Heins (Sunday, 05 February 2017 05:50)
Awesome blog! Do you have any hints for aspiring writers? I'm hoping to start my own blog soon but I'm a little lost on everything. Would you recommend starting with a free platform like Wordpress or go for a paid option? There are so many options out there that I'm totally overwhelmed .. Any tips? Thanks!
Michell Digirolamo (Thursday, 02 February 2017 02:31)
Fantastic post however I was wanting to know if you could write a litte more on this topic? I'd be very thankful if you could elaborate a little bit more. Bless you!
Jess Sullivan (Saturday, 26 November 2016 01:16)
I'm so happy you have a blog. I can't believe how amazing these shots look with normal props.
Linde (Friday, 25 November 2016 22:10)
Super! Ontzettend leuk en duidelijke instructies. Nu voel ik me eindelijk een beetje gemotiveerd om ook weer foto's te gaan maken.
Quitama (Friday, 25 November 2016 19:12)
Geweldig!! Super leukom te lezen en vooral het filmpje is snoezig :)
Sandy (Friday, 25 November 2016 12:05)
Amazing work! Instructions are easy to folow; well written. The end result is beautiful and I really loved it! Thanks.